I always wanted to craft a bow with my own two hands, but I was intimidated by the time, talent, and money it takes. When I first came across the plans for this PVC bow, I thought it was too good to be true. Here was a functional piece of archery equipment, which any child would enjoy, that I could build with tools I already own. And to make it even better, the building process required little or no skill, which is a good thing because I have none whatsoever.
Give me a computer and some high-end modeling software and I can create for you a handyman’s masterpiece. Give me the drawings of said masterpiece and a saw, and I can create for you a pile of sawdust and some appendages that need to be sewn back on. I am happy to report that as of this writing, all my fingers are intact and I have successfully made several of these plastic pipe wonders.
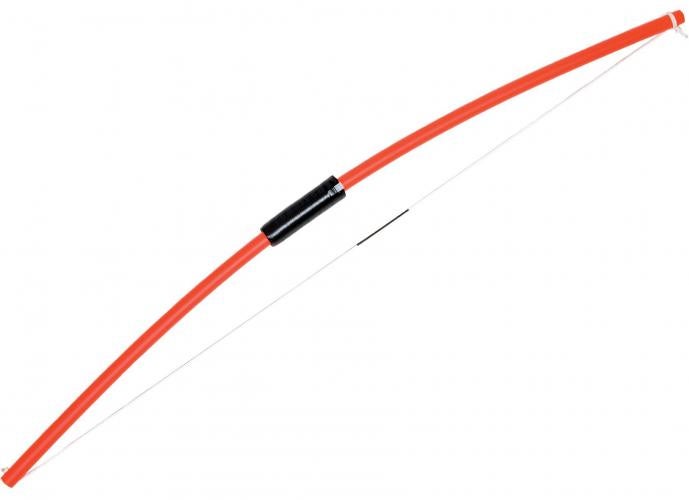
Here are the steps to create one of your own. The design is simple, the cost is cheap — about $2 a bow — and the end product is a real bow with a draw weight between 15–20 pounds. This is a great project for any 4-H club or Cub Scout pack and will introduce kids to the fun of archery without breaking the bank.
I use PVC SCH 40 pipe because it’s inexpensive, around $1.70 for a 10-foot piece, and easy to find. It also has just the right amount of stiffness for a kid’s bow — the finished product will pull around 15 pounds. However, if you do find the bow is too easy for your child to draw, you can stiffen it up by filling it with expandable foam insulation.
A set of free detailed plans for this bow can be downloaded at unitedbowhunters.com/about-ubm. Click on “PVC Pipe Bow Plans.” I strongly suggest you download the plans before beginning this project.
To start, cut a 48-inch piece of pipe with a hacksaw and sand the edges smooth. If you are going to paint the bow, you will need to remove all the writing from the outside of the pipe. Acetone works well for this, but make sure you do it in a well-ventilated area.
Once the pipe section is clean, you are ready to start drilling holes and cutting slots for the string. First, stand the pipe upright on the floor and look down its length from the top end. The pipe most likely will have a bend to it and you want to align this bend so the bowed section faces directly toward you and both ends point away from you. In this position, the inside face of the pipe will be the belly of the bow and the outside face will be its back.
The reason for this orientation is to give the bow more strength. If you look at an unstrung recurve bow’s limbs, you will see the tips curve away from the person holding it. That “recurve” helps the bow store more energy in its limbs.
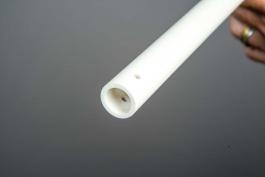
Drill a 3/16-inch hole through the pipe, back to belly, at both ends to pass the bowstring through. It is very important that these holes are properly aligned so the limbs are not twisted when the bow is strung. This is easily accomplished if you have access to a drill press and a vice. However, if you are like me and only have a hand drill, then the process becomes a bit more challenging.
The online plans have a template you can cut out andtape around the pipe to facilitate this task. If you decide to do it the hard way, with just a measuring tape and a pencil, make sure you check your measurements a couple of times before drilling and cutting. The materials may be cheap, but your time is not, and you don’t want to waste any of it.
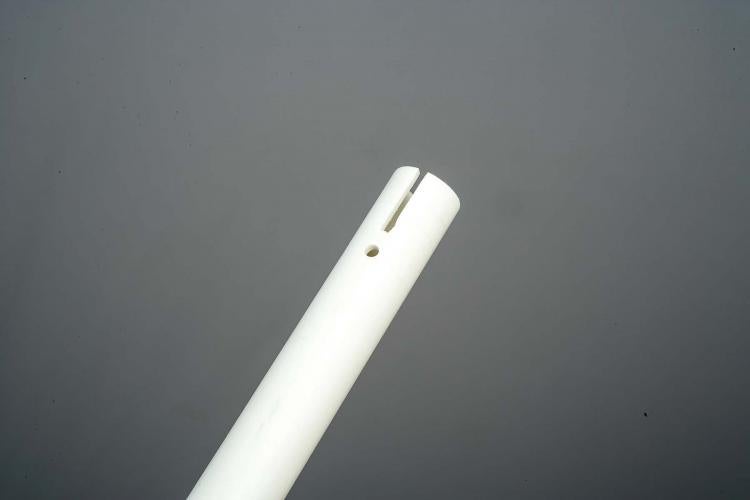
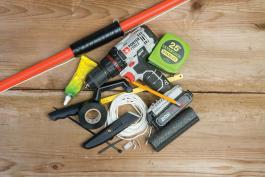
After the holes are drilled for the bowstring, you are ready to cut the 1/8-inch by ¾-inch slots in the top limb. These will be used to secure the bowstring in place once you have the bow strung to the desired brace height. I have found the slots are easier to cut if you first drill a 1/8-inch hole in the bottom of each slot. Then you can use a hacksaw and a utility knife to cut the rest of the material out. A Dremel rotary tool is also very handy for this task. Finally, clean up the slot with a metal file.
To prepare the bow for painting, sand it with steel wool and then clean it off with acetone again. Kids seem to love the bows in fluorescent colors, and I like to do mine in a candy cane pattern. I choose two colors and spray paint the bow completely in the lighter of the two colors. After the paint is thoroughly dry, I take 1-inchwide masking tape and start wrapping it around the bow in a spiral fashion, starting at one end and going to the other. Then I completely repaint the bow using the darker color. When that coat is dry, I remove the masking tape to reveal the candy cane effect.
Now you are ready to put the handle and arrow rests on the bow. Cut off a 5-inch piece of foam pipe insulation. Make a mark on the bow 23 inches from the top limb and 20 inches from the bottom limb. This marks the top and bottom placement of the handle. Take some glue and smear it on the bow between the two marks and put the insulation in place. It doesn’t matter where the seam is located since the insulation will be covered in electrical tape. With the belly of the bow facing toward you, take a cable clip and slip the straight “ear” in between the insulation and the left side of the bow.
Do the same with another cable clip on the bow’s right side. Make sure the clips line up with one another and the center of the bow. Secure them in place by looping a zip tie around the handle and tightening it down on the exposed “ears.” Take another zip tie and tighten it around the bottom of the insulation in the same manner. Cut off the ties’ excess and proceed to wrap the entire handle in electrical tape.
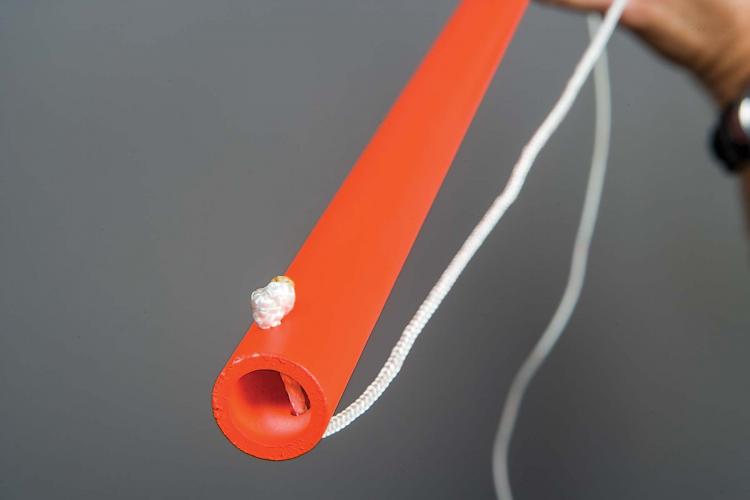
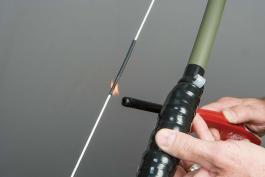
This particular bow’s design has the bowstring permanently attached, so you won’t have to worry about it getting lost. Cut off a 54-inch piece of #48 braided cord and use a lighter to melt the ends to keep the piece fromfraying. With a small knot tied in one end, thread the string back-to-belly through the bottom limb and then thread the string through the top limb in the opposite direction — belly to back. Without bending the bow, pull the string taut and tie another knot as close as you can to where the string comes out of the back of the top limb. This will keep the string from coming off the bow.
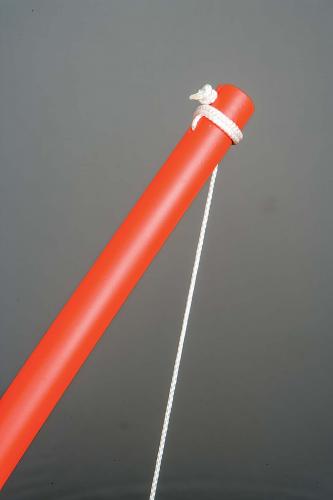
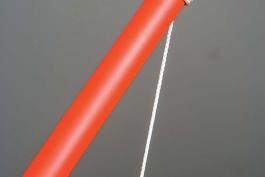
To string the bow, brace the bottom limb against the arch of your foot and bend the bow to the desired brace height, about 6 inches. With the bow in this position, pull the string taut and wrap the excess around the top limb while passing it through the slot. The knot you tied in the top end of the string will get caught in the slot and keep the bowstring from unwinding.
One thing you will want to add to the string before using the bow is some serving to hold an arrow nock snugly. An easy way to do this is to use a piece of 3/16- inch diameter heat shrink tubing about 4 inches long. String the bow to its proper brace height and mark on the string where you want one end of the tubing to go.
Now unstring the bow and untie the knot at one end so you can slide the tubing over the string. Move the tubing to the marked spot, apply some heat, and you have served your string. With the string still untied from the bow, measure from its free end to the end of the tubing and write that measurement down for future reference. That way you can place the tubing on other bowstrings without stringing up each bow beforehand.
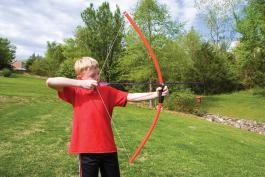
I get a tremendous amount of satisfaction from building these simple, yet effective, arrow flingers. The smile on a young person’s face as they shoot a bow they helped make only adds to that feeling. So go out, gather up the kids in the neighborhood, and start becoming bowyers.
It took me a lot of words to describe this process, but it’s a fairly simple one that takes less than an hour to complete, not counting the paint drying time. It’s cheap entertainment, it gets children off the couch and involved in outdoor activities, and, most of all, it’s fun
Materials Needed for This Project
- ½-inch PVC pipe
- acetone and steel wool
- ½-inch foam pipe insulation
- small plastic zip ties and glue
- ¼-inch coaxial cable clips
- electrical tape
- #48 braided nylon line
- spray paint
- To make your bow handle, first cut a 5-inch piece of pipe insulation. Mark the bow 20 inches from the bottom and 23 inches from the top.
- Glue the insulation in place on the bow, then slip the two cable clamps between the insulation and the bow.
- Secure the loose ends of the cable clamps, then wrap the entire handle in electrical tape to finish it off.
- Tie a knot at one end of the string and thread through the bottom limb to begin stringing the bow.
- Slide the heat shrink tubing into location. Carefully heat the tubing, taking care not to melt the string.
- Tie a knot at the other end of the string. Bend the bow and wrap the excess around and through the slot.
80 Years of Conservation
Archery is a lifetime sport that introduces children and their families to the outdoors. The department established the Missouri National Archery in the Schools Program (MoNASP) in 2002, and it has grown tremendously. It is now in 620 Missouri schoolswith 185,000 students in grades 4–12 participating.







And More...
This Issue's Staff
Art Director - Cliff White
Associate Editor - Bonnie Chasteen
Staff Writer - Heather Feeler
Staff Writer - Kristie Hilgedick
Staff Writer - Joe Jerek
Photographer - Noppadol Paothong
Photographer - David Stonner
Designer - Les Fortenberry
Designer - Marci Porter
Designer - Stephanie Thurber
Circulation - Laura Scheuler


