


For many deer hunters, the evidence of their successful harvest can be found on a wall. Perhaps it’s in a place of honor over a fireplace mantel, overlooking family game night from a wall in the living room, or listening in on laughs and stories in the family cabin. Wherever it is hung, the traditional shoulder-mounted trophy reminds both the hunter and visitors of time in the outdoors and the joy of hunting.
But shoulder-mounted deer trophies can be both expensive and cumbersome, which is why many hunters instead choose a simpler approach: skull or European mounts.
There are many fun ways to display your trophy beyond the traditional mount. Skulls can be hung directly on the wall or attached to a plaque. Consider how much space it will take up, if it will be wall mounted or sit on a shelf, and if you intend to paint or add designs to it. Skull mounts are more compact than shoulder mounts, so they work well in smaller areas.
Making a European Mount
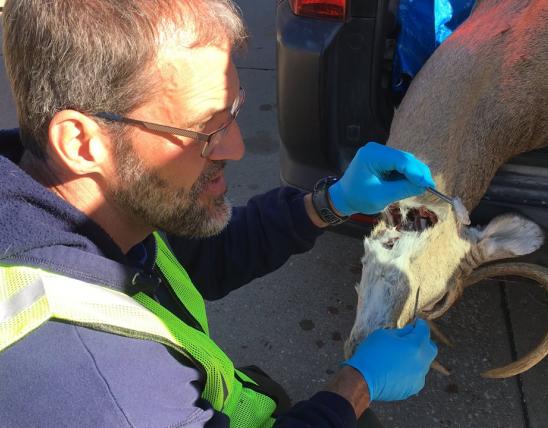
Separate the head from the body as close to the skull as possible without cutting into the skull. A reciprocating saw is the simplest way to accomplish this because it can cut straight through the bones and tendons of the neck. Alternatively, a sharp knife can be used to carefully cut through tendons and connective tissues. Work the blade of the knife between the neck bones, cutting as you go, then the head can be twisted off the body. Wearing gloves is recommended.
Several methods can be used to remove everything that is not bone, including burying the skull, hanging the skull outside, using dermestid beetles, or boiling and/or power washing. Decide how quickly you would like to display your mount and how much you would like to spend. For example, beetles are often used in commercial preparations, but they require care, constant feeding, and containment; they are impractical for home use. Dermestid beetles do not weaken the skull, so they are favored when working with very delicate skulls.
Burying the skull
If you can wait several months and want to exert minimal effort, the head can be buried in the ground with the antlers sticking out. Cover the antlers with a tote or other container large enough to accommodate them. Use rocks on top to weigh the container down and drill small holes in the tote to allow flies and insects to enter while keeping neighborhood dogs and other larger scavengers out. After several months, carefully dig up the skull and wash it off. You will be left with a rustic, earth-brown skull. Any remaining fur can be scraped away. If you are feeling impatient, you can check the skull every two or three months and rebury if necessary.
Hanging the skull
Another “set-it-and-forget-it” method is to place the head outside, on top of a post or in a tree. Over time, nature will clean almost all the material from the skull. Remaining tissue can be removed with a pocketknife. Be aware that small rodents may chew on and damage antlers and exposure to sunlight will bleach the color out of the antlers.
Boiling the skull
For a speedy result that can be done at home, skulls can be boiled in water and/or power washed. This method will require some dedicated equipment, such as a large metal pot from the thrift store or old turkey fryer. The pot must be big enough to submerge the skull. Hot water loosens materials that can then be sprayed off with a power washer or scraped off with a brush or knife.
First, remove all the skin from the deer head. Place the head in a large pot with everything except the antlers submerged and bring the water to a light boil. Take care to keep the antlers out of the water or the water will lighten their color. Check your progress after 30 minutes. Remove the skull from the water and take off loosened tissue. A power washer is helpful for taking off loosened soft tissue, but keep in mind that it will spray meat and tissue far and wide. To power wash a buck mount, hook antlers through a pallet. For smaller mammal and bird skulls, use a brush and reduce boiling time to avoid damage.
Insert a stick or small brush in the hole in the back of the skull to remove brain matter. You will use the same technique to remove the eyes. Take care to not damage the skull. If tissue remains, return the head to the boiling water to loosen more tissue as needed. Check the skull after 15 minutes to see how much tissue can be easily removed. Avoid overboiling as it will weaken the structure of the skull, especially the delicate nasal bones. Repeat this process until the skull is free of soft tissue.
Your canvas
Once all tissue is cleared off the bones, let the skull dry and examine its color. Determine what color you would like your mount to be. If there are dark areas, you can spot treat them to make them lighter using a paper towel with household strength hydrogen peroxide, such as one might use to treat a scratch or scrape. Diluted bleach can be used, but it will make your skull brittle.
Alternatively, a matte white spray paint can be used to provide a uniform color to the skull. Carefully and tightly tape off antlers to protect them from overspray. Once sprayed and dried, you can touch up with a paint brush. Skulls can also be a canvas to paint nature scenes. Your finished mount can be placed on a shelf or attached to a plaque or other board to hang on the wall.
Painting the skull can provide a unique look. Spray cans, paint brushes, cans or tubes of paint can be used, followed by sealing the mount with a clear shiny or matte coat. Hydro dipping (transferring an image, color, or design onto an item by dipping it into paint-coated water) provides limitless options. Adding lights can provide a warm, illuminating glow. These same techniques can be used for other animal skulls, but adjust the time based on size and thickness of the skull. Check often to avoid regrets.
Making a Skull Plate Mount
If a smaller wall mount is desired, you can hold the head with the antlers up or secure the head in a vise and cut straight down with a reciprocating saw, then cut off the bottom to make a roughly rectangular or triangular skull plate. Scrape and scrub away all hide and flesh, then dry and attach to a wooden board with screws. You can use real or faux leather to cover up the skull plate. Trim the leather in an oval with slits and small circles to slide around the base of each antler. Position leather around the skull plate, then attach it to the board with decorative tacks gently hammered into the wood evenly around your rack. Attach a hanger to the back of the wood and pick a spot on the wall to display your achievement.
There are many ways you can prepare skull mounts. Find the ways that give you a product that is visually appealing. As with learning any new skill, be patient and practice when trying new techniques. Keep experimenting and learning ways to use more of your harvest.


Also In This Issue

The story behind the spectacular numbers of snow geese

More than just the headbangers of the bird world
And More...
This Issue's Staff
Editor - Angie Daly Morfeld
Associate Editor - Larry Archer
Photography Editor – Ben Nickelson
Staff Writer - Kristie Hilgedick
Staff Writer - Joe Jerek
Staff Writer – Dianne Van Dien
Designer - Marci Porter
Designer – Lyndsey Yarger
Photographer - Noppadol Paothong
Photographer - David Stonner
Circulation – Marcia Hale